Front Page, The Moves

My Hip Pain Doesn’t Lie

PhotoFunia Quadriptych Regular 2015-01-30 08 59 51Our hips are the base for most of our body’s movement. They are the powerhouse that offers stability for the core and they are the foundation behind locomotion. They propel us in walking and moving up stairs. They are the structure that gives us strength behind a squat, in kneeling, or in lifting heavy object. The hips and lower back are connected though the pelvis. Your hip muscles attach to the pelvis from below (i.e. psoas major, iliacus, quadriceps femoris group, and the addudctors) and the lower back muscles (erector spinae and quadratus lumborum muscles) attach to the pelvis from above.

When we have restricted mobility in our hips, the body compensates and begins to recruit low back muscles to do the work your legs should be doing. A restricted range of motion in the hips creates instability in the low back, oftentimes resulting in low back pain and injury. Why? The low back (lumbar spine) is designed for slight movements—it is not designed to bear loads to compensate for the hips. The body will find the path of least resistance—this is oftentimes where low back pain begins.

Our modern day sedentary lifestyle exacerbates hip immobility. Most Americans sit for over 9 hours per day. Americans, on average, sleep less than 8 hours a day! It is shocking that we sit more than we sleep. Our bodies were meant to move. To walk. To be active. Movement is vital for the health of our hips because the act of movement regenerates fresh cartilage, activates synovial fluid, and maintains range of motion. Sitting most of the day stiffens the hips and can make them weaker from prolonged rest. In order to maintain a healthy hip joint, the ball and socket joint needs to be exercised within all ranges of motion. Walking is the simplest and easiest way to pump nutrients into the hip joints but does not capture the ball and socket’s full range of motion.

At Southside Booty Camp, we incorporate a number of joint rotations and stretches every day that aim to address hip mobility and prepare us for success as we exercise together each morning. However, there are several of these movements you can incorporate in your day-to-day routine to help improve hip mobility gradually. Rather than overwhelm you with stretches and joint rotations, we offer 4 exercises to incorporate into your daily routine. Perform each joint rotation/stretch for 30 seconds on each leg. Give yourself 4 minutes of self-love a day and feel the difference in your hips!

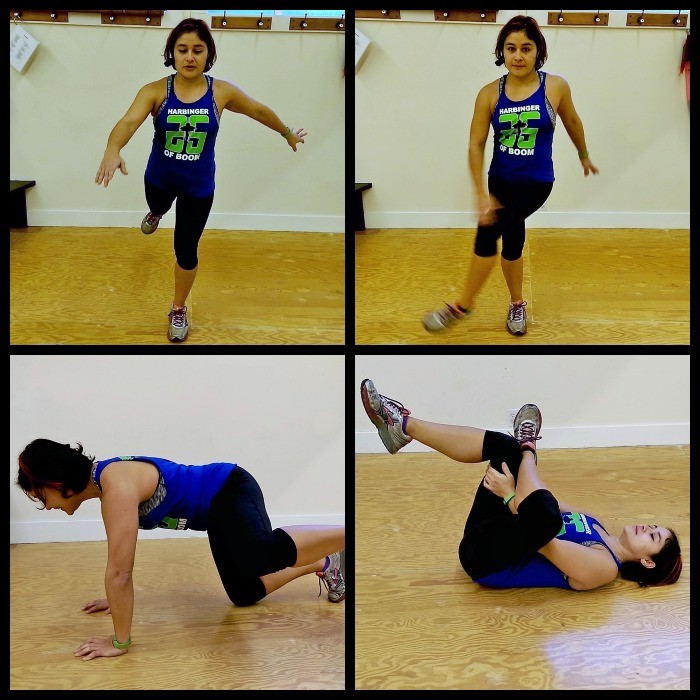
  • Front to Back Leg Swings: Keeping your legs straight, swing leg forward and back. The leg should be nice a loose in the hip socket. (20 swings per leg)
  • Side to Side Leg Swings: Similarly, keeping your leg straight, swing leg side to side across the front of the body. (20 swings per leg)
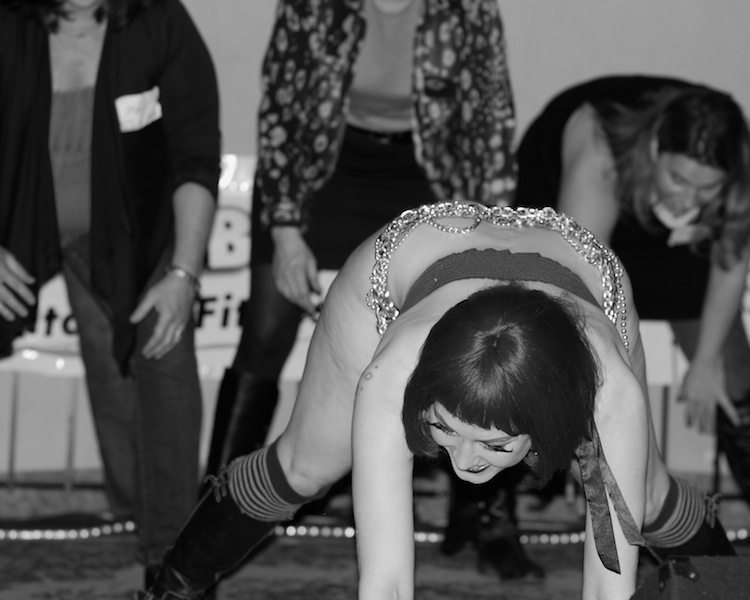
  • Fire Hydrant Hip Circles: Get into table top position. Pick up one leg. Make big circles in the air with the leg. Do 10 circles to the front and 10 circles to the back for both legs.
  • Figure 4 Hip Stretch (or variation): Lay on your back. Plant your feet. Cross one ankle at the knee. Slowly draw your knee in toward your chest. Use your arms to assist the stretch. Hold for 30 seconds. Switch to the other leg.

-Contributed by Trainer Gina

Front Page, Motivation, Nutrition

Mindful Eating in a Mindless World

It’s so easy to be distracted. We’ve all got a lot on our plates (so to speak) at any given time. It’s often especially so with eating. We eat in the car, we eat while playing with our phones or tablets, we eat while reading a book or magazine.

To help with what mindful eating is, it may be helpful to give some examples of mindless eating (or, what mindful eating isn’t). Do any of these habits sound familiar?

  • Eating until you are too full and then feeling guilty.
  • Emotional eating – eating when you are bored, stressed or anxious rather than physically hungry.
  • Grazing on food without really tasting it.
  • Mindlessly munching on snacks while zoned out in front of the TV.
  • Eating a meal at the same time each day whether you are hungry or not.
  • Skipping meals; not paying attention to your hunger signals.

The beauty of mindful eating (besides getting us back in touch with our natural selves), is that it is NOT a diet. It isn’t a fad. It costs you no money. There are no pills, pre-packaged food or giving up of entire food groups. You won’t starve or restrict. It helps you manage your weight, if that is a concern for you.

Mindful eating will allow you to enjoy your food. Every bite takes on a different sensation. You will be aware of your meal. You will be satisfied.

Geneen Roth, in her book Women, Food, and God, offers the following guidelines for kickstarting eating mindfully:

  • Eat when you are hungry.
  • Eat sitting down in a calm environment. This does not include the car.
  • Eat without distractions. Distractions include radio, television, newspapers, books, intense or anxiety-producing conversations or music.
  • Eat what your body wants.
  • Eat until you are satisfied.
  • Eat (with the intention of being) in full view of others.
  • Eat with enjoyment, gusto and pleasure.

Give it a try.. let’s see what happens!

-Contributed by Trainer Michelle


Special Events

Booty Shaking at the 7th Annual holiday Party!

Thanks everyone for coming out to our 7th Annual Holiday Party at our new party location The Mix in Georgetown!

We are so grateful for this year with you all and it was great to celebrate our community together.

The food spread was amazing as always and the lovely Randi Rascal has been with us 3 years now bringing her sweet burlesque style and this year.. a booty shaking lesson! Check out the pics!

Much love and blessings for the New Year everyone!  xoxo


Motivation

REST! It Does A Body Good

Have you ever wondered what rest and recovery have to do with your fitness and wellness journey? How on earth can the time that you’re not working out be as important as the workout itself?

Well, rest assured, it’s more than just not doing physical work, you are actually becoming stronger! 

Although you aren’t doing physical work during that period, your body is repairing itself and getting ready for the next time you exercise. The repair process is the strengthening process.

It helps to know a little bit about that fantastic system our body has called the Muscular System. There are 3 types of muscle in the body. Cardiac (heart); Smooth (walls of internal organs); and Skeletal, which are the muscles that move the body, arms and legs. This last is the one we’ll be discussing.

When you lift weights, your muscles contract. The muscles can both shorten and lengthen. So when you are doing your sets of pushups, squats, etc., your muscles are working to meet the demands you are placing on them. You’re depleting your glycogen stores (muscle energy) and the muscles become fatigued. The muscle, while you’re lifting weights, is getting small tears.  These tears simulate the body’s repair response.

The recovery process (repair response) starts when you are done working out. Your glycogen stores get replaced and the tears are repaired. Time is necessary for the repair process as your body is rebuilding the muscle STRONGER than it was previously. Rest is essential to these improvements.

So what happens if I don’t rest?

Best case scenario is that your performance decreases. Have you ever had the experience of working out a ton, and just not getting anywhere?  A lack of rest could be the cause. You’ll also feel more fatigued when working out. The exercise will be, and feel, more difficult. Worst case is that you will get injured. If the body doesn’t have time to repair, then the tears just get worse and worse.

This is the reason that Booty Camp is set up to have you work out different muscle groups on each day; to give the muscles time to rest. Break Weeks are a great time to rest (and get stronger) as well.

So enjoy your time off, and know that it’s making you stronger and healthier!!

Front Page, The Moves

Total Body Break Week Workout

Don’t let travel and holiday time plans get in the way of your fitness goals.  Looking for a routine you can do anywhere/anytime? This break week workout requires no dumbbells or bands…just your own body! The circuit is a mix of body weight and cardio exercises.

Perform the circuit 2-3x’s depending on how much time you have available. Make sure you warm up for 5-10 minutes before the workout and give yourself some time for stretching at the end.  You deserve it.  Then go enjoy your holiday and send us pics!

Break Week Workout:

Warm Up

5-10 minutes of warm up consisting of: joint rotations, light jog around the block, cardio warmups like jumping jacks, high knees/breaking sticks, etc.

Circuit:

  1. Football Fast Feet: Get down into a low, wide squat; run in place with fast feet. Pump arms vigorously. (50 steps total)
  2. Stutter squat:  Slowly move down into a squat position for the count of three/slowly return to standing in a three count (30 total)
  3. Plank Leg Raises: Hold a plank (elbow or on hands). Lift one heel up in the air and return to the ground in a slow and controlled manner. Alternate legs.  (15 each leg/30 total)
  4. Marching Bridge with kick (30 leg kicks total)
  5. Tricep Pushups or Dips (15)
  6. Bicycles (30 total)
  7. Side plank hip dips:  Hold an elbow side plank; dip hip toward ground and return to side plank position (15 dips on each side)
  8. Jumping Lunges (30 total) (or step back into alternating reverse lunges for low impact option)
  9. Spider Crawls: Hold a plank; draw R knee toward R elbow. Return to start.  Draw L knee toward L elbow.   Repeat. (30 total- 15 each leg)
  10. Speed Skaters (30 total)

-Contributed by Trainer Gina

Front Page, Motivation, The Moves

Getting Started with Running

“As to methods there may be a million and then some, but principles are few. The man who grasps principles can successfully select his own methods. The man who tries methods, ignoring principles is sure to have trouble.”

-Ralph Waldo Emerson

What’s the best way to train to run a race? Any race, be it your first 5k, or your 8th marathon?

The answer is simple; you have to run. Yes, it’s that simple. The principle of running is that you run to run. But how far? And how often? And what do I eat? And what shoes are the best? What about speed work? And hill training?

Congrats to the Booty Babes who did their first ever 5k at the Shore Run last weekend!

What follows is a very basic outline of how to get started and get the most out of your training experience.  (Please note – we will be offering a 5k to Half Marathon Training Series starting March 28 and ending on June 13, 2015 at the Rock n’ Roll Half Marathon … another goal setting opportunity perhaps?!! xo)

  1. Your Attitude

“I hate this.” “Running sucks.” “I’m not a runner.” Do any of these sound familiar? Have any of these thoughts bounced around in your mind? Don’t worry, everyone has these thoughts; even Olympic marathon medalists. But you can change that message.

“I love this!” “I’m getting stronger with every step.” “Running is keeping me healthy.” “ I AM a runner!.”

No one but you can lace up your running shoes and get out there. You don’t need to win races, or even beat anyone in a race to be a “runner.” If you run, you’re a runner! End of story.

      2.    Your Running Schedule

Ah, here’s the rub. Basically, to have a successful race, you need to train. Build a base. It’s the foundation on which you can then increase distance and speed. That means lacing up those shoes and going out for a run. The bonus here is, that as a Booty Camper, you’re already doing that, at least 4 times a week! You need to have an aerobic base to run any given distance successfully. That means putting in some miles. Slow, easy runs.  How far depends on what you’re training for, as does how often. But a good rule of thumb is to try to run at least 3-4 days a week.

Hill workouts are only needed AFTER you’ve built your base. Same with speed, or track, workouts.

      3.    Your Shoes

Wear good running shoes. Your body will thank you, and you’re less likely to get hurt. Yes, they can be expensive, but if you really want to be successful, good shoes are key. Each person has different feet, be it high or low arches, pronation or supination, and so on. Go to a local running store and try on different shoes to find the ones that are perfect for you. They are experts in what they do, and will allow you to actually run in the shoe and will watch your gait to see what is best for you. I’ve had success with these stores in particular:

Super Jock n Jill

Everyone for everyone and everyone for themselves… the journey and uplift of having and completing a “race” goal.

Balanced Athlete

Fleet Feet

West Seattle Runner

The owners of these stores are local runners themselves.

      4.    Your Clothes

Be comfortable, above all. Cotton is not your friend, as when it gets wet (as it will when you sweat) it clings and can lead to chafing. The running stores have good gear, but you can generally wear the same thing you wear to booty camp. Stick with tech or wool.  Layer when needed, and remember that as you stand there being cold, you’ll warm up very quickly when you start to run.


      5.    Your Recovery

Listen to your body! If you are just starting out, you may need more rest. If there’s a certain body part (usually knees or feet) that is starting to nag at you, stop then to assess it. If you try to “run through it” or “tough it out”, you’ll probably get injured. Talk to your trainer at that point. Sleep is key, as is stretching, and when needed, a foam roller.  Epsom salt baths relax the muscles before sleep, as well as a magnesium/calcium vitamin before bed.  Also, hint hint: Join us for Yoga Fridays here!

     6.    Your Nutrition

You need fuel to run. We could spend days covering this topic alone, but suffice it to say that the fuel should come in the form of carbs (burn quickest) and a little protein. Protein is more for after you run, for helping to build muscle tissue. Staying hydrated is also key, so make sure to drink your water.

     7.    Your Race Day

The main event! Have your clothes laid out the night before, with your race number pre-attached if at all possible. Whatever you’ve been doing in terms of nutrition and clothing during training, stick with this on race day. Never wear new shoes or clothes on race day! That is, clothes or shoes you’ve not worn before this day. That just opens the door to chafing, blisters and a generally bad time.

This is a VERY brief synopsis to get you started. So let’s hit the road!

-Contributed by Trainer Michelle

The Moves

Mobility and Stability

Ever wondered why your knee hurts, when you’ve never injured it? How about your low back? Ever felt pain there?

To keep it simple, think of the body as a stack of joints. Each joint has a specific function, either mobility (movement) or stability (bracing).  The joints alternate between mobility and stability. Now, this isn’t to say that the joints are only mobile or stable, but just primarily so.

We get a basic, alternating set of joints.

From the bottom up, here are the joints and their primary function:

Ankle – Mobility

Knee – Stability

Hip – Mobility

Lumbar spine – Stability

Thoracic spine – Mobility

Scapula – Stability

Shoulder – Mobility


Given that these are the primary functions of these joints, what happens when a joint that should be mobile is immobile? Problems at one joint usually show up as pain in the joint above or below.

Thus, when you lose ankle mobility, you get knee pain. When you lose hip mobility, you get low back pain, lose thoracic mobility, you get neck and shoulder or low back pain.

Why?

If you look at the body as a chain of joints, it makes sense. For instance, if the ankle becomes immobile, the knee, a joint that should be stable, becomes unstable. The ankle is supposed to be mobile; its job is to absorb the stress of landing on the foot as we walk or run. If the mobility isn’t there, then the stress is transferred to the joint above, the knee, which is not built for absorbing this stress. Hence, knee pain.

The hip should be mobile. It is meant to flex and extend. Flexion allows you to lift your leg forward to the front, extension allows you to bring your leg to the back. It also allows you to rotate your leg in and out and also to move your leg out to the side, and to cross your leg in front of the other. When these movements are stymied by immobility, there is compensatory movement in the lumbar spine (low back). Low back pain can result. There are, of course, other causes of low back pain, but one that is fixable with flexibility exercises; stretching, yoga, and other modalities.

If you can fix the cause of the problem, instead of treating what actually isn’t hurt, you can end your pain, and move like you were meant to move.

The above is a very simplified version of joint mobility/stability and resulting pain. As always, please consult your provider for medical assistance and advice.


-Contributed by Trainer Michelle

Motivation, Nutrition

Outwitting Your Metabolism

What is metabolism?

Metabolism is the body’s process of breaking down proteins, carbohydrates, and fats to yield the energy it needs to maintain itself.  The rate of your metabolism is based on the number of calories you consume and the number of calories you burn—both while eating and exercising and as a result of your individual genetic makeup.

Ways to increase your metabolism

The best way to jump start your metabolism is to increase your body’s need for energy.  While the body can burn calories from either fat, protein, or carbohydrates, the body normally prioritizes carbohydrates to burn over fat. Why?  Our bodies aren’t wasteful; they will only burn fat when they need to for energy.  We need to outsmart our primal instincts to conserve fat stores (we are animals after all, you never know where the next food source might be!) to jump start that metabolism and burn fat.  Here are some key actions you can take to increase your metabolism:

  • Interval training—when we integrate interval training in our fitness routine, we also maximize the calories burned after each of those workouts.  You burn extra calories, even at a resting state, after an interval training workout. It’s called the “after burn effect” and can last for several hours.
  • Add muscle mass—muscle burns more calories than fat.  Being more muscular boosts your body’s energy needs.  Adding muscle mass increases your resting metabolism. Each additional pound of muscle you carry can burn up to 50 additional calories just to maintain itself.
  • Eat foods that require extra energy to digest and metabolize—your body burns twice as many calories digesting high-protein foods as it does foods that are high in carbohydrates or fat.
  • Eat often but eat right—by eating frequently, you reassure your body that you aren’t going to starve. While recommendations vary, eating every 2 to 3 hours feeds muscle and starves fat.   Each time you eat, you stimulate your metabolism.  However, don’t use that as an excuse to snack.  Eat healthy foods. For example, increasing your intake of vegetables is one of the best ways to increase your metabolism!
  • Drink plenty of water—enough said.
  • Get good sleep—inadequate sleep can also impact your metabolism.  According to one study on webmd.com, the rate of calories your body burns in a resting state represents about 60-75% of your total daily calorie burning. Slowing your metabolism through lack of sleep is a roadblock to weight loss.
  • Consume Omega-3 fatty acids—Studies show fish oil increases levels of fat burning enzymes and decreases levels of fat storage enzymes in your body.
  • Increase physical activity in all aspects of your daily life.  Regular movement throughout the day nudges a sluggish metabolism.  Have walking one-on-one meetings, take the stairs, go for a daily 5 minute walk, stretch while watching television or at your desk.  All of these things make a difference.

-Contributed by Trainer Gina

Nutrition

Snacking for Health

Snacking for Health

I don’t know about you, but I love to snack.  Booty camp workouts make me hungry!  However, my snacking habits are often based on the food I have laying around the house or something I can quickly purchase during the busy day.  You have to make the conscious decision to snack healthy. According to research by the USDA, snacking is a dietary behavior that has increased in recent decades in the U.S., and correlated in part, with the increase in the American population who are overweight and obese.   Snacking is typically associated with increased caloric intake and decreased nutrient intake.  But it doesn’t need to be that way.  When done right, snacking can be used to keep your energy levels up throughout the day and can provide an opportunity to get in all of your nutritional needs.  Here are a couple of snacks you can make in advance that offer a healthy and wholesome alternative AND will satisfy that craving.

Baked Kale Crisps

If you are craving something salty (like potato chips), try baked kale chips!

  • 1 bunch kale (rinsed and dried)
  • Coconut or olive oil
  • 1/4- 1/2 tsp. sea salt
  • Other spices to your taste (I like cumin, chili powder, garlic powder, etc.)

Preheat oven to 350° Fahrenheit.  Remove kale from stalks and break into 2-inch pieces.  Massage oil, salt and spices into kale pieces until evenly distributed. Spread kale out over a baking sheet (you can use parchment paper or foil but not necessary). Make sure the pieces of kale don’t overlap.  Bake for 10-12 minutes (the amount of time will vary with each oven) until the edges of the kale are nicely browned and crisp but still green. If some kale chips are still a little flimsy or damp, remove the crisp chips and place the damp chips back in the oven for a few more minutes. Store in an air-tight container.

Kale Dusted Popcorn

Grind up or crumble your crisp kale chips on top of air popped popcorn for a variation on the snack.  You can add olive oil, salt, pepper, and the kale for flavorful toppings on your popcorn.

White Bean and Roasted Garlic Dip

Are veggies and hummus your go to snack?  It is a great healthy snack, but if you are like me, you are probably burnt out on hummus. There are a ton of great blended alternatives to hummus that offer the same amount of protein and nutritional value. Try making some white bean and roasted garlic dip as a sub to your typical hummus:

  • 4 tablespoons extra-virgin olive oil, divided
  • 2  whole garlic heads
  • 2  (16-ounce) cans canellini beans or other white beans
  • 1/4 cup fresh lemon juice
  • 1/4 teaspoon salt
  • 1/4 teaspoon white pepper

Preheat the oven to 375°.  Prepare roasted garlic: Cut the top third of garlic heads off so tops of cloves are exposed. Place heads, unpeeled, in ovenproof dish and drizzle with 1 tablespoon oil. Cover with aluminum foil; bake 30 minutes. Uncover and bake until the garlic cloves are soft and golden brown, another 30–40 minutes. (Make ahead and store in an airtight container in the refrigerator for up to 5 days.)

Blend it all up: In a food processor, combine the beans, roasted garlic, remaining 3 tablespoons oil, and lemon juice and process until smooth. Add the salt and white pepper. This will keep in an airtight container in the refrigerator for up to 3 days.  Enjoy with your choice of crisp vegetables like cauliflower, carrots, snap peas, broccoli, etc.


-Contributed by Trainer Gina

The Moves

February Break Week Workout!

Here’s a workout that will get all of your muscle groups and in a short amount of time. Use your weights or bands.

Warm up for at least 5 minutes with light jogging, high knees, arm circles, butt kicks and backstroke/front stroke.

The Workout!!

Do each exercise 12 times. You can go through this up to 4x.

  1. Plank jacks (in plank position, jump your feet out wide) – OR – knee pushups
  2. Squat to overhead press
  3. Partial burpees (come down to a crouch position, walk both legs out so you’re in plank, walk both legs back in to arms, stand up. That’s one)
  4. Rear lunge to kick
  5. Skull crushers (lay on mat. Start with arms up lined up over shoulders. Bend elbows so arms bend, and weights come to either side of head.)
  6. Deadlift
  7. Warrior 3, alt (also known as drinking bird)
  8. Bicycles, 12 per side
  9. Delt lifts (arms at a 45 degree angle, lift up to shoulder level)

10. In-outs (on back, up on elbows, legs together, send feet out, then back)

Please cool down with some cobra, down dog, quad stretches, calf stretches, figure 4, delt stretch, and tri stretch.

Contributed by Trainer Michelle